Top Digital Art Techniques Every Beginner Should Master
Are you diving into digital art and wondering where to start? Whether you're sketching your first character or experimenting with color, having the right tools, and techniques, makes all the difference.
If you've already invested in the Best Drawing Tablet to buy for enhancing your skillset, you're on the right track.Digital art opens up endless creative possibilities that traditional mediums can't always offer. With layers, customizable brushes, and instant editing, you have everything you need to grow quickly as an artist.Now, it's time to learn the essential techniques that will take your art to the next level.From layer mastery to color theory, this guide will bring you through the most important digital art methods for beginners.
List of Digital Art Techniques You Should Know
1. Understanding Layers
Layers allow you to separate and organize parts of your artwork like line art, colors, and shading. This makes editing easier and keeps your workflow clean and non-destructive. Learning to use layer modes like Multiply and Overlay can enhance your shadows and lighting effects.
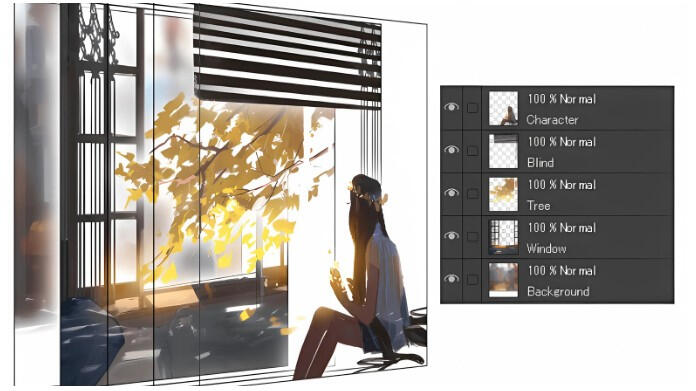
Use dedicated layers for line art, color, shadows, lighting, effects, and background.
For easier organizing, group relevant layers together (for example, a character's outfit and accessories).
Explore blending modes like Multiply (for shadows), Overlay (for highlights), and Screen (for light effects).
Try clipping masks to shade or highlight specific parts of your artwork without going outside the lines.
Layers are your safety net. With proper layering, undoing mistakes becomes effortless.
2. Brush Control and Settings
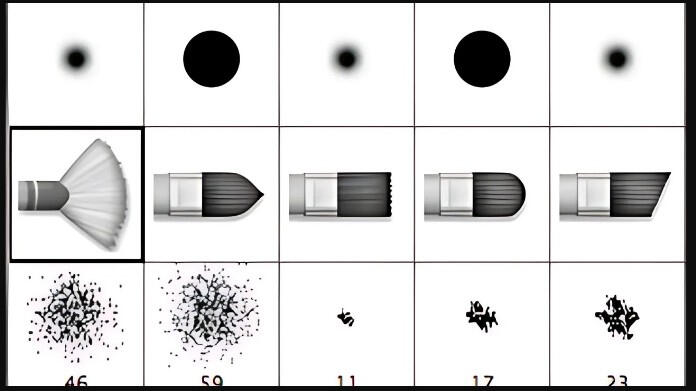
Your digital tools for painting and drawing with various effects are brushes. Gaining control over texture, opacity, and pressure enhances accuracy and originality. You can gain confidence without feeling overwhelmed by starting with a few simple brushes.
Familiarize yourself with different brush types: inking, painting, texture, and smudge brushes.
Practice pressure sensitivity on your tablet to create expressive strokes that change with hand pressure.
Change the opacity, flow, hardness, as well as size to fit your artistic style.
Many software programs allow you to create your own brushes, which adds a personal touch to your work.
The better your brush control, the more natural and dynamic your art will feel.
3. Sketching and Line Art
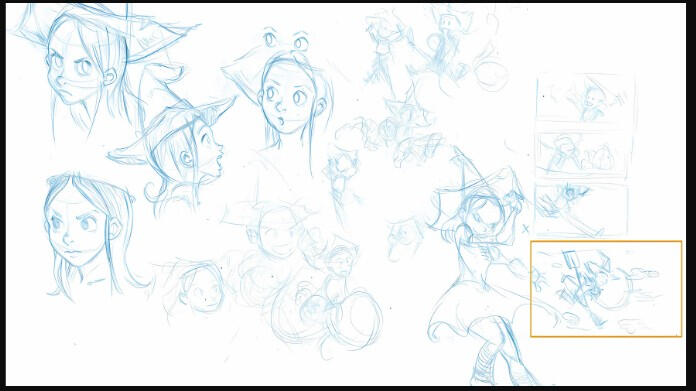
Your artwork starts with a solid drawing, and clear line art gives it gloss and clarity. Your lines will look better if you use stabilizers and a variety of line weights. Instead of over-rendering every detail, focus on drawing with intention.
Begin with light, rough strokes & then progress to more detailed sketches.
Reduce opacity and sketch over your rough drawing to refine it before inking.
Use a stabilizer feature (available in many programs) to help you draw smoother lines if you struggle with shaky hands.
To demonstrate depth, distance, and emphasis, vary the line weight (thicker or thinner lines).
Strong line art is the difference between a rough draft and a polished illustration.
4. Color Theory Basics
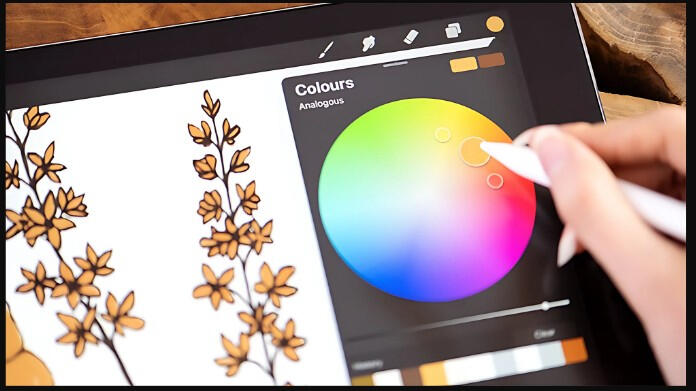
Understanding how colors interact helps you create harmony and contrast in your work. Mastering warm vs. cool tones and complementary schemes adds mood and emotion. Choosing the right palette can drastically affect the storytelling in your piece.
Learn about complementary, analogous, and triadic color schemes to make your artwork more visually appealing.
Use warm colors (red, orange, yellow) to draw attention and express energy and cool colors (blue, green, purple) to create calm or mysterious vibes.
Try using fewer color schemes to make your composition more cohesive and harmonious.
Make use of the color picker to sample and match colors from references or within your own artwork.
A solid grasp of color theory turns a decent drawing into a stunning one.
5. Shading and Lighting
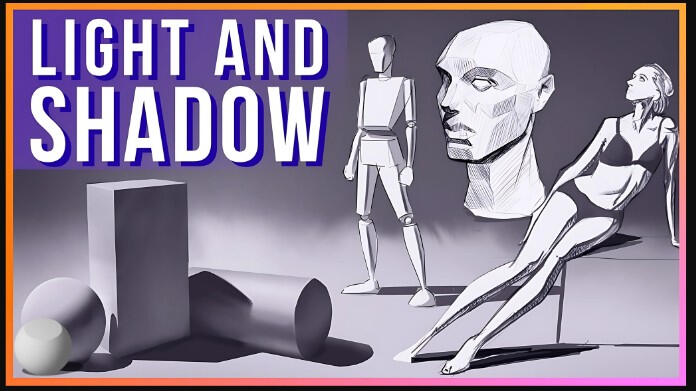
Shading creates depth and volume, whereas lighting determines form and focus. Learning to study light sources will allow you to create more realistic & vibrant artwork. Depending on your preferred style, experiment with various shading techniques, such as cel-shading or soft shading.
Begin by establishing your light source; understanding where the light is coming from allows you to determine where shadows and highlights should go.
Use Multiply mode on a new layer to add shadows without covering your base colors.
Try soft and hard shading techniques—soft for skin and fabrics, hard for mechanical or sharp-edged objects.
Introduce reflected as well as rim lighting to create depth and a cinematic effect.
Great lighting can tell a story all on its own.
6. Blending Techniques
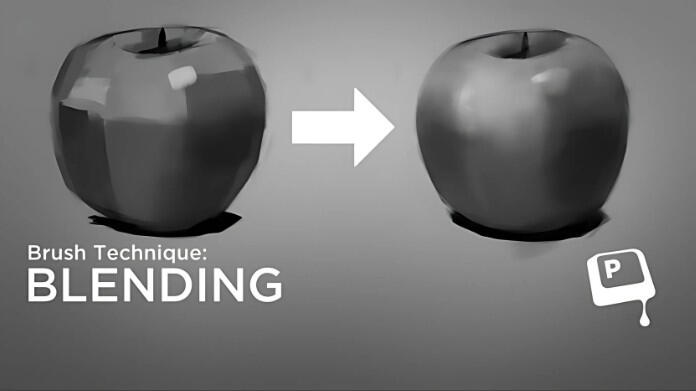
Blending smooths the transition between colors or shadows, creating a more natural finish. Soft brushes, smudge tools, and low-opacity strokes are great starting points. Practice subtle transitions to make your art feel more cohesive and lifelike.
Use soft brushes or smudge tools for gentle transitions.
Build up tones gradually using low-opacity strokes to avoid harsh edges.
Discover glazing, a method for altering tone and warmth that involves applying thin layers of color.
Use color picking while blending to refine the transition between two colors.
Masterful blending creates a smooth, professional look that’s easy on the eyes.
7. Using References and Grids
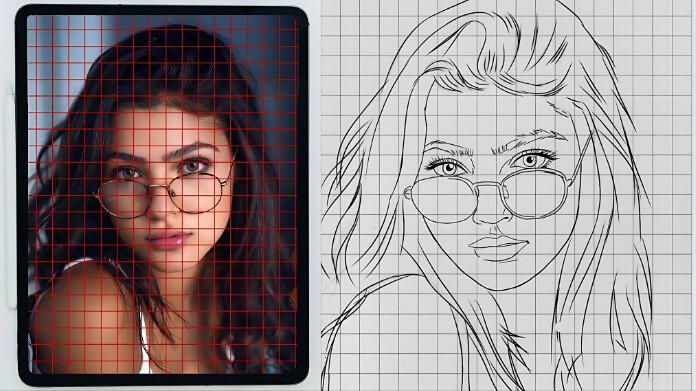
Using references allows you to improve your accuracy in anatomy, perspective, and proportions. Grids can help improve alignment & balance by breaking down complex images into digestible portions. It is possible to strengthen your visual memory by studying authentic images and artwork.
Examine lighting, postures, attire, and items using reference photos.
Apply the grid method to transfer proportions accurately from reference to canvas.
Try overlaying your work on top of a reference to check alignment and perspective.
Over time, you’ll rely on them less as your muscle memory improves.
Every great artist learns from others; references are not a kind of cheating.
8. Custom Shortcuts and Workflow Hacks
Customizing shortcuts and automating tasks accelerates your workflow. It reduces repetitive actions, allowing you to focus on creativity along with production. A streamlined setup enables you to work more quickly and retain momentum in your projects.
Learn keyboard shortcuts for your most-used tools like Brush (B), Eraser (E), Undo (Ctrl+Z), and more.
Create custom actions or macros to automate repetitive tasks like saving, resizing, or color correction.
To expedite your work, make use of pre-made palettes, layer structures, and templates.
Save versions of your work at different stages so you can return to a previous version if needed.
A streamlined workflow lets you focus more on creating and less on clicking.
Final Thoughts
Mastering digital art takes time, but beginning with the appropriate techniques makes the process easier and more fun. Practice constantly, learn from artists you respect, and don't be afraid to experiment.With these foundational skills, layers, brush control, line art, color theory, shading, blending, references, and workflow, you’re well on your way to developing a professional-level digital art style.
About the Author
Hi, I'm Caden Rodriguez, a digital artist, technology lover, and creative explorer. I've spent years experimenting with various tools and techniques to have a better understanding of digital drawing.I wrote an article to share what I've learned with novices who are just getting started with their creative path.I hope you found these tips helpful and inspiring! Feel free to share your thoughts or techniques you’ve discovered; I’d love to hear from fellow artists.
Ref:
[Marc Brunet]. (2024, December 29). 60 DIGITAL ART TIPS in 6 min | Can you handle it? [Video]. Yotube. https://www.youtube.com/watch?v=-ii2yHvXe4E